Resizing your images one by one isn’t much fun and it can actually get pretty annoying after a while and if you have hundreds or thousands of images, it can be a huge waste of time… Fortunately for us, Photoshop can actually do this for us automatically.
Am I kidding? No, I’m not. In fact, you can even get Photoshop to open your images, resize them and save them for you! In the video below, I show you a couple of different ways that you can do this:
Can’t view the video? Watch it on YouTube
Here are the written instructions:
There are actually a couple of ways that you can do this… For example, you can either open up all of your images in Photoshop and then have them resized automatically for you or you can put all your images in a folder and point Photoshop to that folder.
Then you can either have those images saved in the same folder or have them saved in another one. Personally, I like to save my images in another folder because this keeps the originals in case I make a mistake…
So to start, you’ll want to open up an image in Photoshop.
Then go to your actions window. If you don’t see the actions window, you can go to “Window” in the toolbar to make sure that “Actions” has a check mark next to it. If it doesn’t, simply click it.
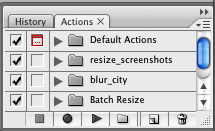
The actions window looks like this:

This simply click the folder icon ![]() to create a new set.
to create a new set.
In the dialog window that pops up, enter a name for your new set. This can be anything that you want. In the video, I gave it the name ‘batch resize’.
After you’ve created your set. Click on the ‘create new action’ icon which looks like this ![]() .
.
In this dialog box, enter in a name for your action which again, can be anything, and make sure to choose the set that you created earlier from the dropdown menu and click the record button.
When the recording starts, resize the image that you created earlier and if you want Photoshop to also save the images for you, make sure to go to “File > Save As” and save the image in a format of your choice.
Note that it’s very important to record the save as action if you want Photoshop to save the images for you because it keeps you from having to interact with the dialog boxes during the batch process.
When you are finished recording your actions, simply click on the ‘stop playing/recording’ icon ![]() in the action window.
in the action window.
Now you are ready to start the batch process by going to “File > Automate > Batch…”.
In the batch dialog window, you’ll notice a play section. In this section, you’ll want to choose the set and action that you just created.
For source, you can choose “Opened Files” if you want Photoshop to resize the images that you currently have open, or you can choose “Folder” to specify a folder that the images are in.
If choosing a folder, simply select it and also make sure to check off “Include All Subfolders” if you have folders with images inside of the folder.
If you’d like to suppress options dialogs or warnings, be sure to check of those boxes as well.
For destination, if you’d like to save the files to the original location, simply choose “Save and Close”. If you’d like the images saved in another folder, be sure to choose “Folder” from the dropdown menu.
Also check off “Override Action “Save As” Commands” if you are specifying a folder because this overrides the folder that you chose while recording your action set.
Click the “OK” button and watch while Photoshop does all the work or not.
