After showing you how to change the color of clothing in Photoshop, I figured I’d put together another tutorial which shows you how to change the color of skin! So yes, no more having to worry about your models getting a tan before a photo shoot.
Note that the techniques used in this tutorial will also work with clothing and objects, so it’s not like it’s limited to coloring over skin. It’s just that it’s more time consuming using a brush to paint over other things… Of course there are situations when a brush is the only solution.
Below you can see the before and after pictures.
Before tan:

After tan:

Here is the step by step video tutorial and beneath it you will find a whole written tutorial with pictures.
Can’t view the video? Watch it on YouTube
To start, open up your image in Photoshop. If the image layer is locked (as shown below locked layers display a lock icon), simply double click the layer to unlock it.

You can either name your layer or leave it as is. I just left it on the default name.

Add color:
In the layers window, hold down the “option” key on your keyboard if you are on a Mac computer or “alt” key if you are on a Windows computer and left click the two tone circle icon which reads “create new fill or adjustment layer”.

The “hue/saturation” option will create a new layer. You can either give this new layer a name or leave it as is. I just left it as is in the video.

Now tick off the “colorize” checkbox as shown below.

Now adjust the “hue, saturation and lightness” sliders to your desired level. Below you can see my settings.

After adjusting your sliders, you should now have an image that has been fully colorized as shown below. If the color isn’t exactly as you want it or are unsure if the color is correct, don’t worry about it because you can always change it later.

Temporarily hide the color:
Now will hide the color and reveal only the areas that we want colored in. To do this, we need to make sure that “layer mask thumbnail” is selected in the hue/saturation layer as shown below.

Now go to “edit > fill”.

Fill in the layer will black. We are doing this because our layer contains a mask and when a mask is filled with black, it becomes hidden.

Reveal the color only on skin areas:
Select the paint brush from the tool bar on the left ![]()
Now choose a brush size and brush head. I used a soft round brush head with a hardness of 0%. Note that the size of the brush depends on the size of your image so you will need to choose a brush size that works well for you.

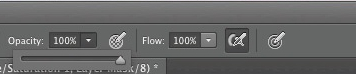
Now choose 100% for opacity, 100% for flow and select the airbrush.

If your paint isn’t white, be sure to change it to white ![]()
The hex color code for white is #FFFFFF. We are using white because when we paint with white over a black mask, the areas that we paint over get revealed.

Start painting over the skin as shown below.
Made a mistake? Here’s how you can fix it:

To restore areas that you’ve accidentally painted over, simply change your paint to black ![]()
The hex color code for black is #000000.

Now simply paint over the areas that you’d like to restore as shown below.

Resume coloring over the skin:
When you are ready to paint over the skin again, simply switch back to white paint ![]()

If there are areas that seem to dark when you paint over them such as by the hairline, simply lower your opacity. In the video, I lowered the opacity to 70% as shown below.

As you can see in the image below, the area by the hairline, look much better after lowering the opacity.

When finished with such areas, simply raise the opacity back up to 100%.
Paint over the rest of the skin as I did in the video. In tight areas, you can use a smaller brush and in wider areas, you can use a larger brush.

How to change the color:
After you’ve finished painting over the skin, you can always change the color quickly and easily by clicking on the two toned circle next to the hue/saturation layer.
![]()
When you click on the circle, it opens the hue/saturation properties window as shown below. Simply readjust the “hue, saturation and lightness” as you wish.

To paint over or restore areas of the skin or around the skin, simply click on the “layer mask thumbnail” in the hue saturation layer. Then grab your paint brush and paint. Just remember that black paint hides areas and white paint reveals areas of the mask.
![]()
Again, here is what my image looked like after I finished painting over the skin.