In this tutorial I decided to show you how to create transparent text in Photoshop. In the image below, you can see how this will look after you’ve finished editing your image.

As you can see, the effect looks very professional and would look great on a poster, as a caption on an image or anything else that you can think of. Below you can watch the video tutorial in its entirety and beneath the video, you can read the written tutorial if you’d like.
Can’t view the video? Watch it on YouTube
Prepare your background image and layers:
Start by opening up the image that you’d like to use as your background.

If the layer is locked, unlock it by double clicking on it in the layers window.

Give your unlocked layer a name or leave the default name.

Click the folder icon at the bottom of the layers window to create a new group.

Now select that new group and click the page icon at the bottom of the layers window to create a new layer.

Go to “edit > fill” to fill in the new layer with a color.

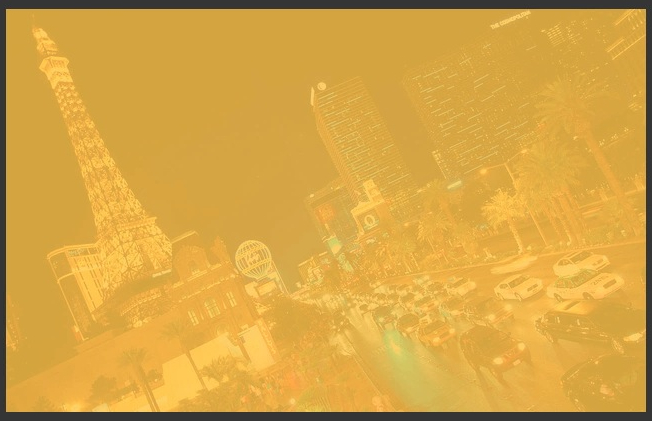
I used the hex color code #f3bb0a for my image because the image had a bit of yellow in it and figured the color would match well. Of course for your image, you can use any color.

After filling my layer, it looked like this:

Now lower the opacity of the layer to a level that you feel looks good. I lowered the opacity of my layer to 80%.

After lowering the opacity, my image looked like this:
Create your text:
Click on the horizontal type tool in left toolbar ![]()
Now type your text, choose a font type, position your text etc. Note that you can also change your font after you’ve finished editing the image.

When you’re happy with how the text looks, simply click the checkmark in the top toolbar ![]()
Add a transparent effect to your text:
Now select your layer which contains the text.

Now click on the arrow in the right top corner of the layers window which looks like this:
![]()
From the drop down menu, choose “blending options”.

In the advanced blending section, choose “shallow” for knockout and change the fill opacity to 0%.

If you’d like, you can also add a border around your text by ticking off the checkbox next to “stroke”. When you are finished editing your text, click the “ok” button.

Now select the rectangular marquee tool from the left toolbar ![]()
Select the area of the fill layer that you want to delete.

After selecting the area, go to “edit > clear” to delete that area.

Right click on the selection and click on “deselect” to clear the selection.

Once finished, your image should look similar to mine: