Changing the color of clothing in Photoshop can be a real time saver when you have identical items that are available in different colors. Which is why I’ve decided to put this tutorial together which shows you how to change the color of an item quickly and easily.
Below you can watch my video tutorial and beneath it, I have the main steps written and have uploaded some pictures as well. Note that while I am using Photoshop CC in this tutorial, older versions that are as old as Photoshop CS3 will work (maybe even older ones).
Can’t view the video? Watch it on YouTube
To start, open up your image in Photoshop. If the layer containing the image is locked, simply unlock it by clicking on the layer as shown below.

Select color range:
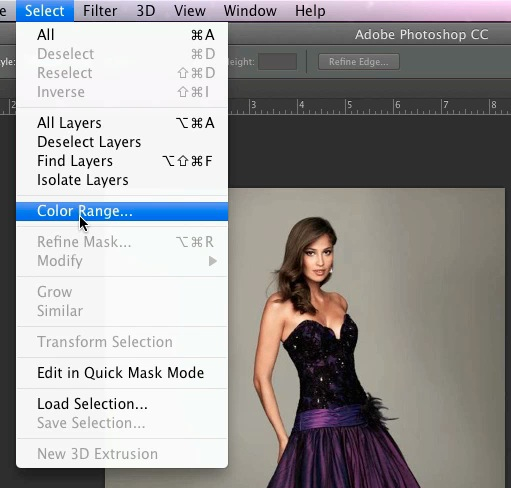
Next you will need to go to “select > color range” as shown in the picture below.
Select your clothes in the image:
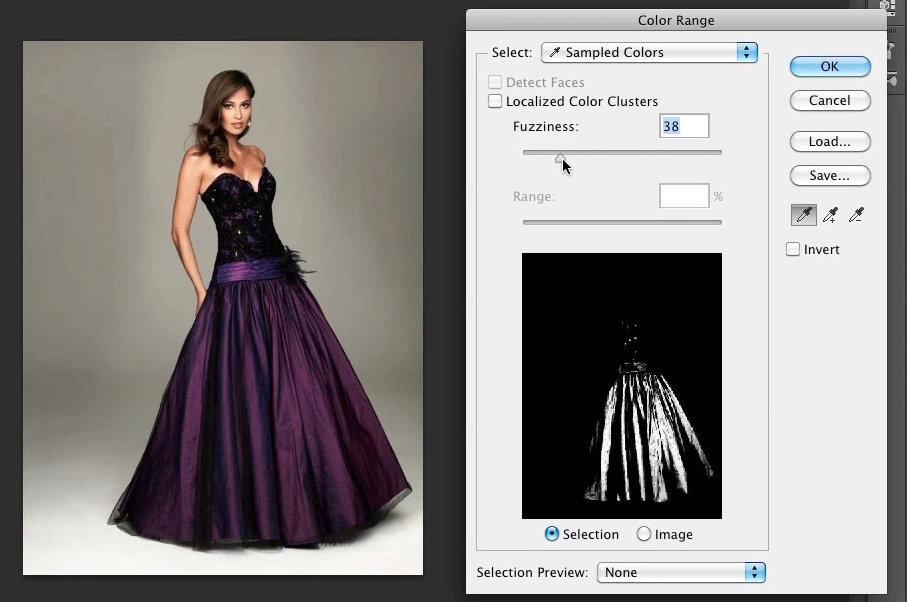
As you can see in the image below, color range opens up a window which allows you to select colors in your image using an eyedropper. In the tutorial, I was selecting a dress. To do this, I first adjusted the fuzziness level.
The fuzziness level basically tells Photoshop how closely it needs to match a color. The higher the fuzziness level, the more it picks up different shades of the color.
If I were to go very high in fuzziness, it would start picking up areas that I don’t want selected. Note that you can adjust the fuzziness level even after selecting your colors with the eyedropper.
Now you can use the eye dropper to select your clothing. Note that there are 3 eyedroppers that you can choose from on the right. There is the regular eyedropper, one with a plus (+) sign as well as one with a minus (-) sign.
The regular eyedropper basically selects just one color. The one with the plus sign, lets you choose multiple colors and the one with the minus sign lets you remove a color.
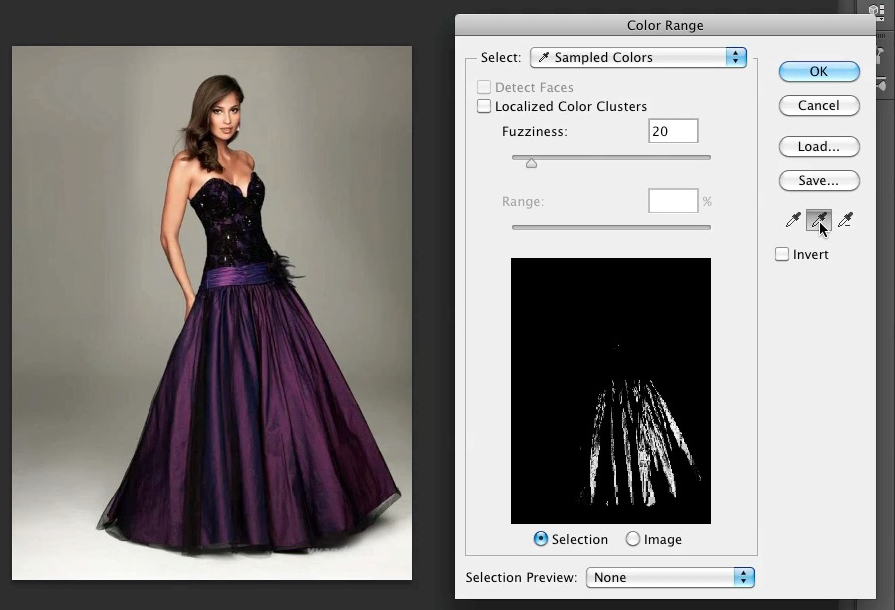
In the video I used the eyedropper with the plus sign while holding down the shift key on my keyboard. I held down the shift key so that I could pick up multiple colors at once. My goal was to pick up all shades of purple and due to the lighting and shadows, there were different shades of purple.
By using the eyedropper with the plus sign and holding down the shift key on my keyboard, I was able to select my entire dress.
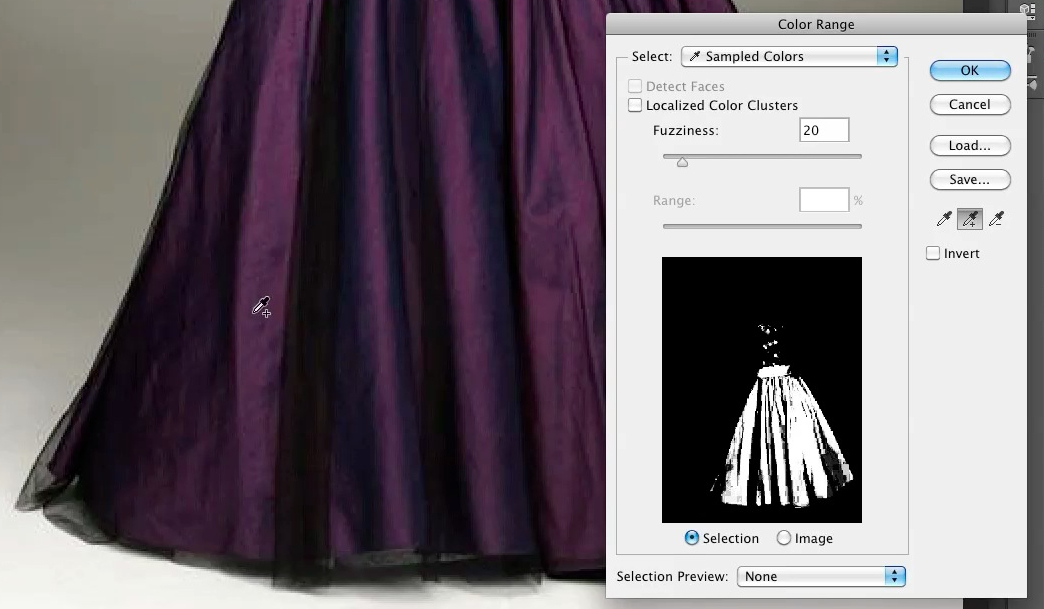
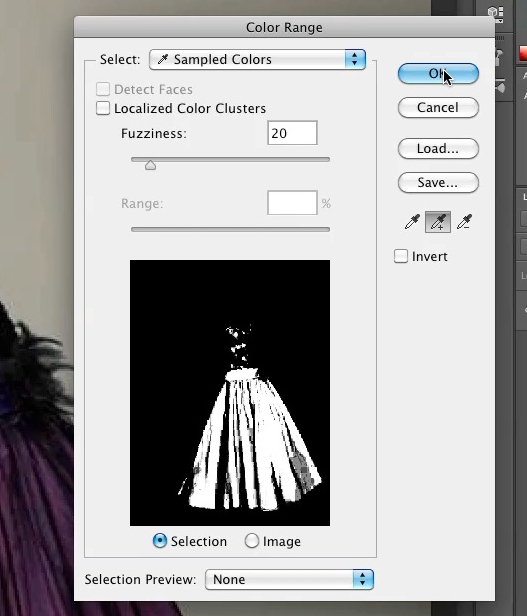
As you can see, the preview screen shows you the area that you are selecting. Once I have selected the entire dress, I simply clicked on the “ok” button for the selection to appear.
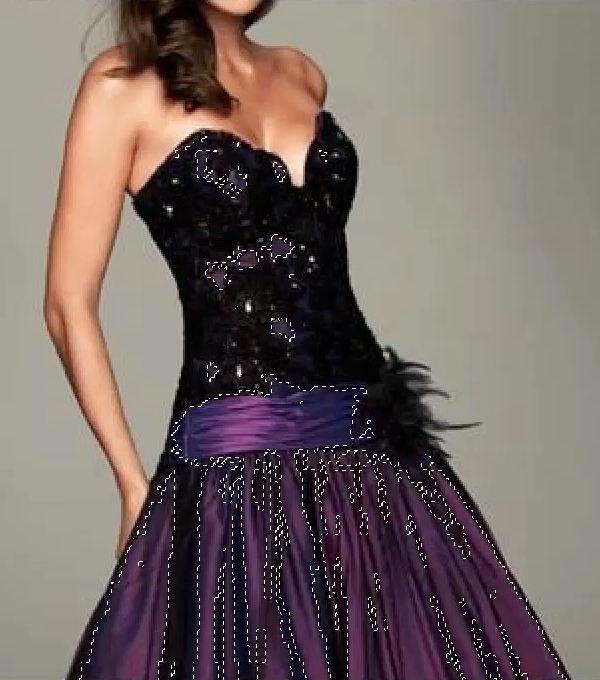
Once your item is selected, it will look like this:
Change the color of your item:
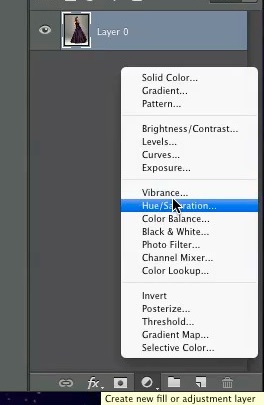
Now you will want to click on the two tone circle icon which reads “create new fill or adjustment layer” while holding down the “option” keyboard key if you are on a Mac or the “alt” keyboard key if you are on a Windows computer and click on “hue/saturation” from the menu with your mouse. Hold down the “option” or “alt” key until the dialog window appears.
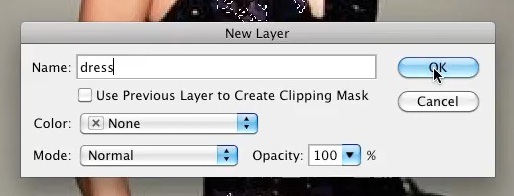
In the dialog window, you can rename your layer or leave it on the default. I entered dress just to make things easier.
Now a color window will appear. In this window, check off the box “colorize”.
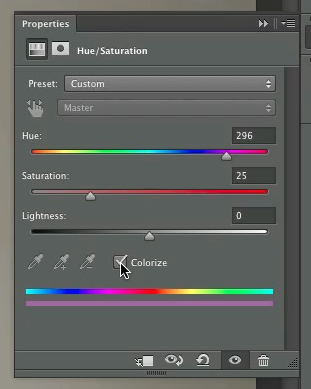
Afterwards, simply move the sliders “hue”, “saturation” and “lightness” to the level of your choice. As you can see in the image, I turned a purple dress into green.
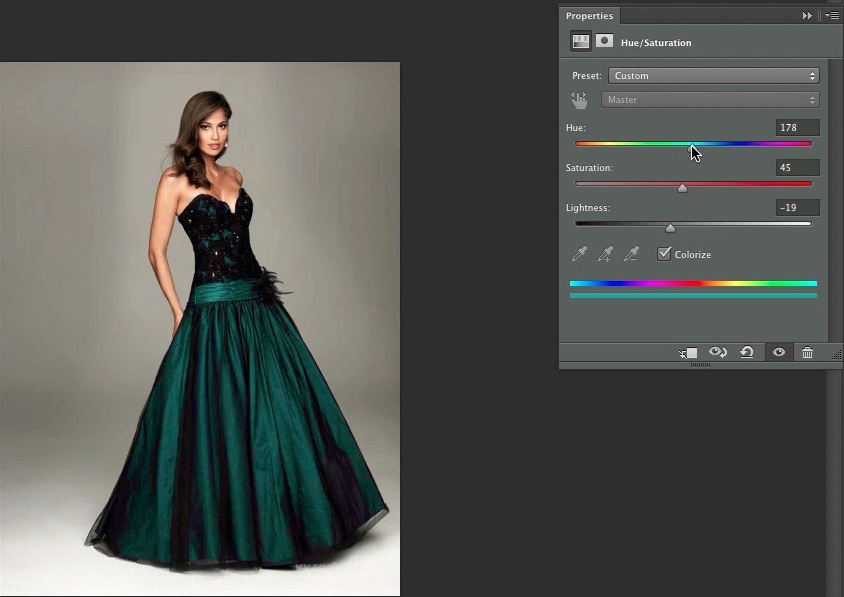
To add more colors, simply right click on the “hue/saturation” layer and duplicate it. Then adjust the color by clicking the layer thumbnail, but remember to hide the other “hue/saturation” layers by clicking on the “eye” icon. After creating all your color layers, you can switch between colors by hiding and unhiding the layers.
Other techniques for changing color:
While this tutorial focuses on skin, the techniques used in the video can work with clothing as well. These techniques are especially useful when it comes to clothing and objects that are difficult to deal with.

