After showing you how to list a standard product in PrestaShop 1.6.x and briefly covering combinations, I figured I’d put together this tutorial which shows you how to create product attributes.
Here I not only show you how to create attributes, but also how to take advantage of the product combinations generator which is a huge time saver since it allows you to generate combinations in bulk. This way you don’t have to add each combination one by one as I did in my tutorial on how to list a standard product.
In addition to that I show you how to create different types of attributes such as: drop-down lists, radio buttons and color or texture select buttons.
After creating the attributes, I also show you how to add them to your layered navigation menu which is displayed on category pages — which is used to filter listings by attribute.
Can’t view the video? Watch it on YouTube
Creating product attributes:
To create your attributes simply go to your admin panel and then click on “catalog” and “product attributes”.
To add a new attribute, click on the “add new attribute” button at the top of the page.
In the “name” field enter the internal attribute name (the name which is displayed in the admin panel).
If you are using multiple languages, you can use the drop down menu to select the other languages and enter in the translated text for those languages.
In the “public name” field, enter in the attribute name that you want displayed to customers.
In the “URL” field, you can enter in the name that you want displayed or you can let PrestaShop automatically generate this URL using the public name value.
For those of you that are not familiar with the URL field, this value is basically displayed in the address bar of browsers when your visitors select the attribute on the product listing page.
Having the attribute in the URL makes it easy for your customers to share your listings on the web.
So say for example, you have a shirt that is available in black, red and orange, and say the default is black, well when your customers choose orange, the URL changes and if they share that URL with others, those that visit the URL will see the orange shirt rather than the black shirt.
As for the META title, this is the title that is shown in web browsers, Google, Bing, Facebook etc. Here you can enter in your own META title or let PrestaShop automatically generate this title using the public name value.
As for indexable, you will want to choose “yes” if you want the attribute shown in URLs that are generated by the layered navigation module.
The layered navigation module basically generates these URLs when someone filters your listings by attribute on category pages. If you do not want the attribute indexable, simply select “no”.
As for “attribute type”, simply select from:
- Drop-down list
- Radio buttons
- Color or texture
Below you can see an example of each of these:
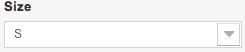
A drop-down looks like this:
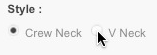
Radio buttons look like this:
A color attribute type looks like this:

Note that texture is the same and the only difference is that your uploaded image is displayed in the square.
When finished, click on “save”.
Adding attribute values:
To add a value, go to your admin panel, “catalog” and “product attributes”. Then simply click on the “add new value” button at the top of the page.
On the next page you will want to select your attribute group using the drop down menu — simply select the attribute that you want to add a value to.
In the “value” field simply enter in a value. For example, if your attribute is for shoe sizes, you would enter in the shoe size in the value field.
As for “URL”, you can enter in a value here or let PrestaShop automatically generate the URL using the value in the value field.
For “META title”, you can either enter in a value here or let PrestaShop automatically generate the value in this field using the value field.
If you are specifying a value for a color or texture attribute type, you will want to select the color using the color picker.
If you are specifying a texture, you will want to upload the texture image using the file field.
When finished click on the “save then add another value” button or the “save” button if you are finished.
Add your attributes to the layered navigation module:
To add your attributes to the layered navigation module, simply go to your admin panel, “modules” and “modules” and look for the layered navigation module and click the “configure” button.
In the “filters templates” section, simply look for the template that you’d like to add your attribute to and click the “edit” button.
Then simply look for the attributes that you’ve just created and slide the slider from no to “yes” to have your attribute displayed on category pages.
Note that you can also select a filter style and filter results limit.
When finished, click the “save” button.
Using your attributes when listing an item:
To add your attributes to a product listing, simply go to your admin panel, “catalog” and “products”.
Then simply click the edit button next to an existing product or click on the “add new product” button at the top of the page to create a new product.
If creating a new product, simply enter values into all the required fields and click on “save and stay”.
Then simply go to “combinations”.
On the combinations page, you can either enter in each combination manually or you can click on the “product combinations generator” link to generate your combinations in bulk.
If using the combinations generator, simply select multiple attributes at once via the select menu or select each attribute one by one and click on the “add” button to add the attributes to the attributes generator.
Note that you can even increase or decrease the weight or price for your attribute values by entering the amounts in the “impact on the product price” or “impact on the product weight” fields.
Note that all values entered in the impact fields are increased by default. If you’d like to decrease the price or weight, you will have to edit each value manually after generating the combinations.
In addition to that, you can also add a default quantity and reference.
When finished, simply click on the “generate these combinations” button.
At this point, the combinations should have been added to the combinations section. If you’d like to make any edits to these combinations, simply click on the edit button next to the corresponding attribute.