After showing everyone how to tan a person’s skin, I figured I’d also show everyone how to apply makeup on a model’s face using Photoshop. In the after picture below you can see how real the makeup looks once applied:

So as you can see, this is a complete step by step tutorial that shows you how to: even out a person’s skin, add eyeshadow, eyeliner, lipstick and blush.
I’m actually very proud of the transformation and I think it looks great. My goal here was to keep things looking real so I restrained myself from making the model look like a cartoon because that’s usually what happens when you overdo things. Below you can watch the video to see how I did all this:
Can’t view the video? Watch it on YouTube
Open your image:
First let’s start by opening up the image of the model that we’d like to apply make up to.

Next you’ll want to unlock that layer if it’s locked by doubling clicking on the layer in the layers window.

If you’d like you can enter in a name for this layer or leave the default name and then click on the “ok” button.

Even out a person’s skin:
First we’re going to even out the model’s skin. Basically I wanted the model to look like she had applied a bit of cover up. So let’s create this illusion by first duplicating the layer containing the image of our model by right clicking on the layer and then selecting “duplicate layer”.

Enter in a name for this duplicate layer or leave the default and click on the “ok” button.

Next you’ll want to go to “filter > other > high pass”.
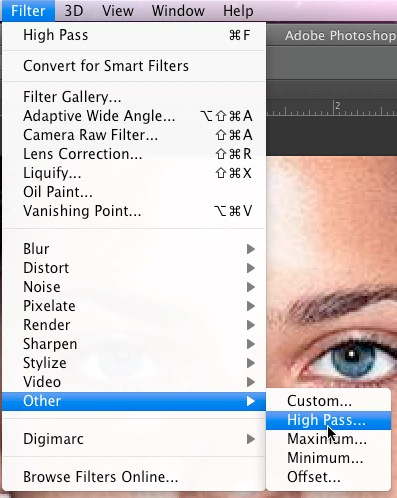
Now you’ll be asked to enter in a radius. I entered in 6.0 pixels.

Then from the drop down menu in the layers window, select “overlay”.

Now go to “image > adjustments > invert”.

After inverting the image, it will look something like the picture below:

As you can see above, things are a bit too blurry, so we need to modify this by lowering the opacity of the layer. While I lowered the opacity to 60%, you’ll want to lower it to a level that clears up the skin a bit but doesn’t actually make the image too blurry.
Note that it’s ok if the image is somewhat blurry because we will actually apply some fixes which will make things blurry only in the right places.

After adjusting the opacity, my image looked like this:

Now to add those fixes that I mentioned earlier, we will need to add a layer mask. To add a layer mask, click on the rectangle with the circle in the middle as shown below:

Now you’ll want to go to “edit > fill”.

For the fill, use black and click on the “ok” button. We are using black because when a mask is filled with black, it actually hides the contents of the layer underneath it. We are basically hiding things so that we can reveal only certain areas.

To reveal these areas, click on the “set foreground color” icon ![]()
Then choose white paint which is the hex color code #FFFFFF and click on the “ok” button to close the dialog box.

Now click on the “brush tool” icon in the left toolbar ![]()
Choose a brush size that you can easily paint over the skin with and make sure that opacity is at 100%. As for the brush head, I chose soft round.
If you are uncertain of which brush size to use, you basically want a size that you can easily paint over the skin with. Which means that you will want to leave the eyebrows, eyes, lips, hair etc. alone. You can of course start with a large brush size and use a smaller brush in tight spaces.

Now simply paint over the skin by holding the left mouse button down while dragging over the skin. In the layer mask you can see which areas you’ve covered because those areas show up as white and areas that you haven’t painted over show up as black.

Apply eyeshadow:
Create a new layer by clicking on the page icon in the layers window as shown in the image below:

Next select the polygonal tool from the left toolbar. Note that the polygonal tool might not be selected by default. For example, you might have the lasso tool which looks like a rope or the magnetic lasso tool which looks like a magnet preselected. Right click on any of those icons to reveal the menu which lets you select the polygonal lasso tool.

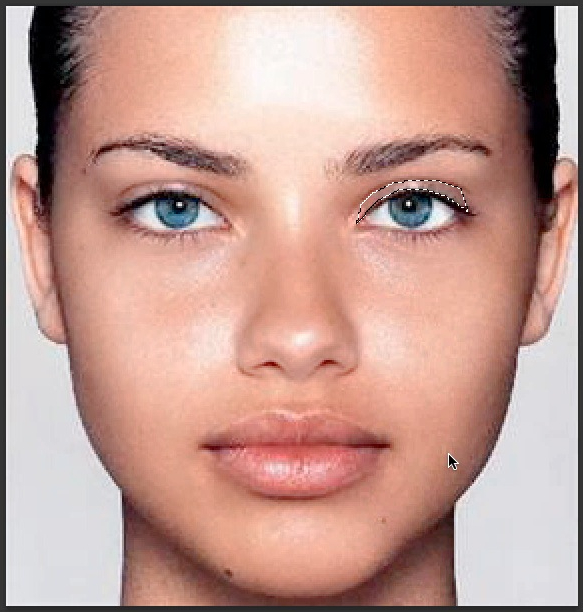
Now simply draw over the right eyelid with the polygonal tool.
Now right click on the selection and left click on “fill” in the menu.

Then in the contents section where it say “use”, select “color” from the drop down menu.

Then choose the color of your eyeshadow. As you can see in the image below, I went with a blue color which is the hex color code #0428c3. You can, however, choose any other color.
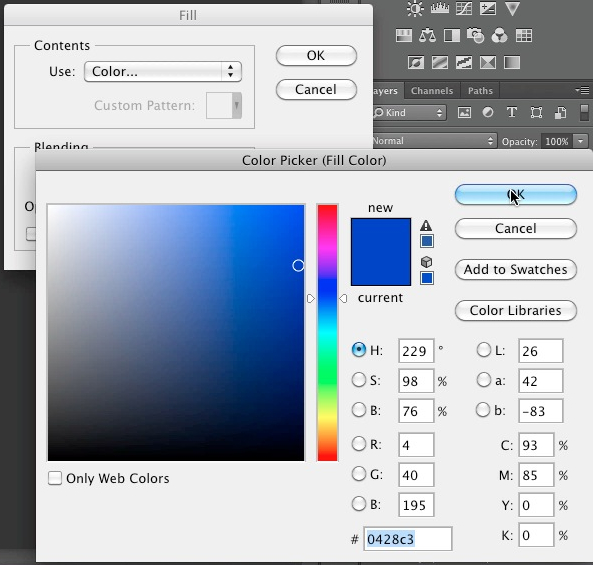
After entering in your color, click on the “ok” button to close the dialog.
After applying the color, my image looked like this:

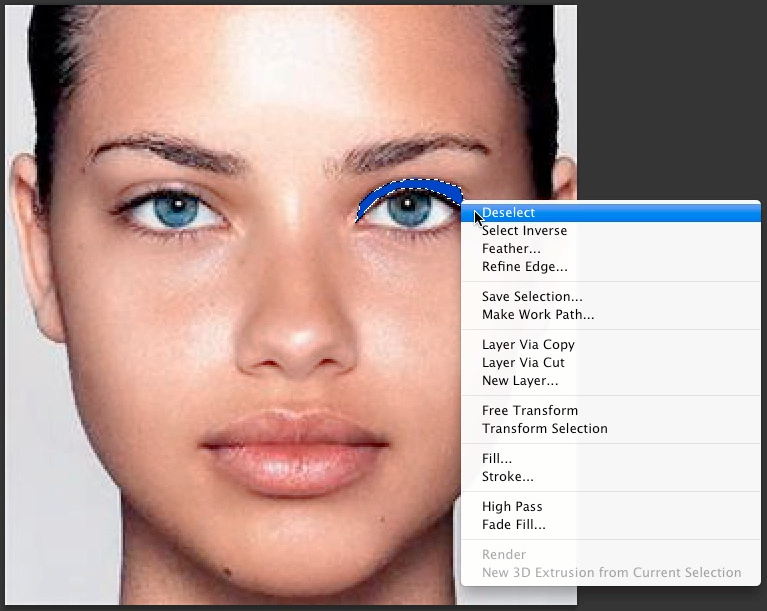
Next you’ll want to right click on the selection and left click on “deselect” to deselect the eyeshadow.
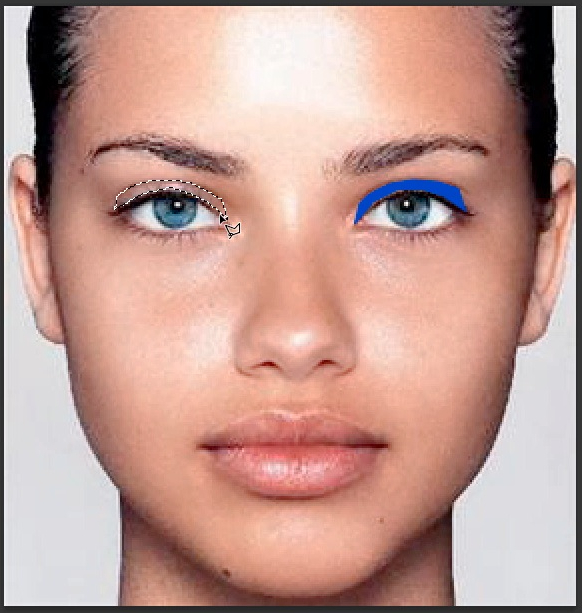
Now you’ll want to repeat the steps above for the right eye. So let’s start by drawing with the polygonal tool on the left eyelid.
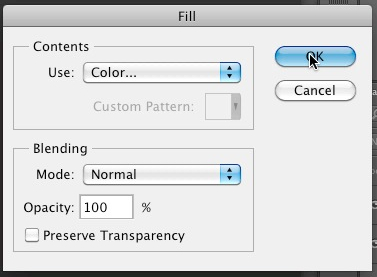
Now right click on the selection and left click on “fill” in the menu that pops up.

In the fill dialog, ensure that color is selected for “use” in the contents section and click on the “ok” button. Since you already chose a color for the right eyelid, that same color will be used for the left eyelid when you have color selected.

Now right click on the left eyelid selection and click on “deselect”.

Now go to “filter > blur > gaussian blur” to blur out the eyeshadow.

Choose 4.5 pixels for the radius in the dialog window that pops up and click on the “ok” button.

In the layers window, choose “overlay” from the drop down menu as shown below:
At this point the shapes that you colored in should look more like eyeshadow but due to the blur, the eyeshadow might have spread onto areas that you don’t want. To fix this, you can smudge the eyeshadow around similar to how you would smudge real eyeshadow.
So to do this, simply select the “smudge tool” which looks like a finger from the left toolbar. Note that you might have the blur tool which looks like a raindrop or the sharpen tool which looks like a triangle preselected. If you do, simply right click on any of those icons to reveal the menu which lets you choose the smudge tool.

Then adjust the brush size. Note that too large of a brush size might smudge away more than just the eyeshadow so try not too use a size that is too large.

Then adjust the strength to a level that you are comfortable working with. For example, a very high strength level smudges more and a lower strength level smudges less.

Now smudge away the eyeshadow from areas that you ended up covering by accident.

Apply eyeliner:
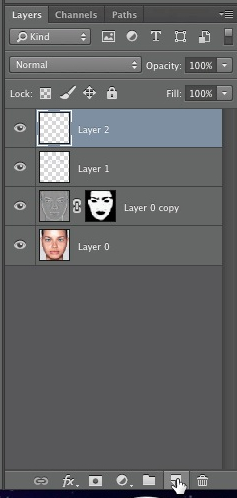
Start by creating a new layer by clicking on the page icon at the bottom of the layers window.
Next click on the “set foreground color” icon in the left toolbar ![]()
Choose black paint which is the hex color code #000000 and click on “ok”. We are using black because this will be the color of our eyeliner.

Change the brush size to 2px, choose soft round for the brush head.
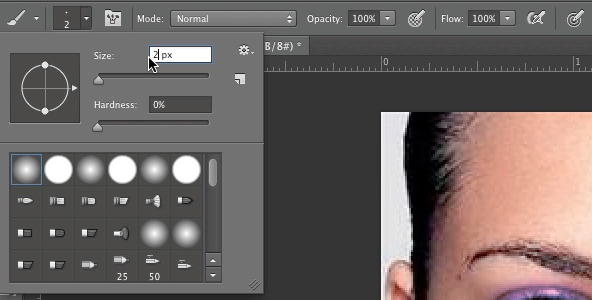
Make sure that opacity and flow are at 100%.

From the left toolbar, select the “pen tool” icon which looks like this: ![]()
Make sure that “path” is selected in the menu at the top.

Draw a line with the pen tool on the right eye along the edges of the upper and lower eyelid where the eyelashes start.

Right click on the line that you just created and click on “stroke path”.
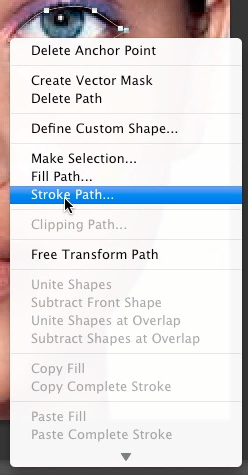
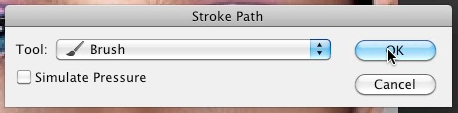
In the stroke path dialog window that opens, choose brush for the tool and click the “ok” button.

Next, right click on the path and left click on “delete path” from the menu.

Now repeat the above steps for the left eye. Start by drawing a line on the edges of the upper eyelid and lower eyelid of the left eye where the eyelashes start.

After drawing your line, right click on the shape and select “stroke path” from the menu.

In the stroke path dialog box that opens up, select “brush” for the tool and click on the “ok” button.
Right click on the shape on the left eye and click on “delete path” from the menu.

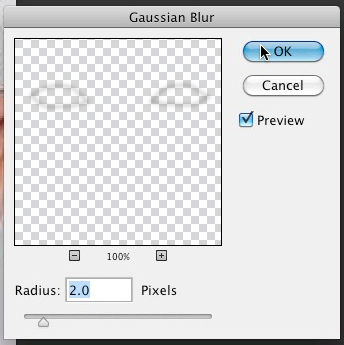
Now go to “filter > blur > gaussian blur” to make the eyeliner look real.

Choose 2.0 pixels for the radius and click on the “ok” button.
Apply lipstick:
Let’s apply lipstick by first creating a new layer by clicking on the page icon at the bottom of layers window as shown in the image below:

Now click the “pen tool” icon in the left toolbar ![]()
Select path from the top menu as shown below:
With the pen tool, draw a line all around the edges of the lips as shown below:

After drawing your line, right click on the line and left click on “make selection” in the menu that pops up.

In the make selection dialog box, choose 0 for feather radius and click on the “ok” button.

Now hold down the “alt” key on your keyboard if you are on a Windows computer or the “option” key on your keyboard if you are on a Mac computer and left click on the “create new fill or adjustment layer” icon in the layers window and selection “hue/saturation”. This icon looks like a two tone circle as shown below:

In the dialog window that pops up, enter in a name or leave it on the default name and click on the “ok” button.

A properties window will appear. In this window tick of the “colorize” box as shown below:

Use the “hue, saturation and lightness” sliders to adjust the color of the lipstick. I choose a hot pink which you can see below:

Since the edges along the lips look too sharp, I’ve decided to blur out the lipstick layer a bit. To do this I went to “filter > blur > gaussian blur”.

I choose 3.5 pixels for the radius but you can choose a different radius if you’d like. After entering in the radius, click on the “ok” button.

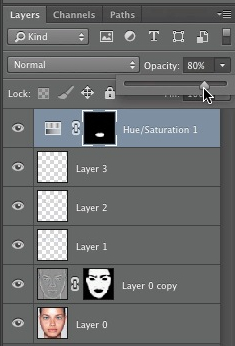
After adding the lipstick, I felt that things would look a bit more real if I lowered the opacity of the lipstick layer a bit so I lowered it to 80%.
Since I ended up covering a bit more than just the lips with my color, I needed to erase those areas. To do this, I clicked on the “set foreground color” icon in the left toolbar ![]()
I then entered black which is the hex color code #000000. I am basically using black because our lipstick layer has a mask and when you paint over areas of a mask with black, those areas become hidden.

So to paint over these areas, I clicked on the “brush tool” icon ![]()
I then simply painted over areas that I wanted to remove the lipstick from.

Apply blush:
Choose a brush size that you can easily cover the cheeks with and select soft round for the brush head.

I had my opacity at 100% because I decided to lower the opacity of the layer rather than of the paint. I decided to activate airbrush capabilities by clicking on the airbrush icon in the top toolbar.
![]()
I then created a new layer by clicking on the page icon in the layers window as shown below:

Next click on the “set foreground color” icon ![]()
Then simply choose the color of your blush. If you’d like to use the same light pink that I used, the hex color code is #faa9f7.

Then simply paint over the cheeks. For best results, try to cover the cheeks with one even paint stroke.

Now blur out the blush by going to “filter > blur > gaussian blur”.

Enter the blur radius in the dialog window that pops up. I entered 9.5 pixels for the radius.

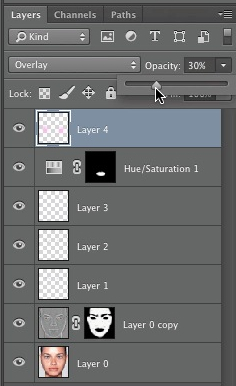
In the layers window, select “overlay” from the drop down menu.

I also lowered the opacity of the blush layer to 30% because I just wanted to give the model a slight hint of blush. You can of course lower the opacity to a level that you feel looks good.
Model with makeup applied:
After completing all of the above steps, my model looked like this:

Here are the before and after side by side shots. As you can see, the changes are dramatic yet subtle. The makeup also looks real and not like it was applied digitally.
