If you are using stock images that many other people are using, it might be a little harder to stand out from the crowd. This is why I’ve decided to put together this tutorial which shows you how to give your images a little something extra.
Below you can see the before and after effect of a reflection that was added. It’s very subtle and looks pretty cool in my opinion. While I don’t think this effect will look good on all images, it will look great on many.
Here’s the before:

Here’s the after:

Creating a reflection effect is actually pretty easy and in the video below I show you every step.
Can’t view the video? Watch it on YouTube
Here’s the written tutorial:
Start by opening up your image in Photoshop.
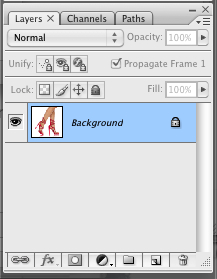
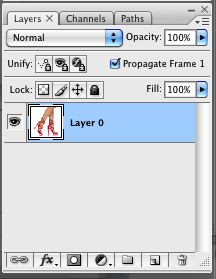
Then look in your layers window to make sure that the layer is unlocked. If you do not see the layers window, simply go to “Window” in the toolbar and make sure that “Layers” has a check mark next to it. Then simply double click on the locked layer to unlock it.
A locked layer looks like this:

An unlocked layer looks like this:

Next go to “Layer > Duplicate Layer…”.
In the dialog window that opens up, you can either enter in a name or leave it as is.
Now go to “Edit > Transform > Flip Vertical” to turn your image upside down. Then simply drag the upside down image and position it with the original.
Note that you may need to remove the background. In the video, I was able to remove the background by using the ‘magic wand tool’ ![]() because the background was easily distinguished from the foreground. Of course, since this doesn’t work with all images, you may want to take a look at this tutorial which shows you how to use the background eraser tool.
because the background was easily distinguished from the foreground. Of course, since this doesn’t work with all images, you may want to take a look at this tutorial which shows you how to use the background eraser tool.
Note that since my original image wasn’t on a straight line, I had to warp the image by going to “Edit > Transform > Warp”. There are actually many different ways that this can be done. You can also use the ‘rectangular marquee tool’ ![]() to cut the layer into pieces and move it so that the two layers meet. Of course, if your image is on a straight line, you don’t have to worry about this.
to cut the layer into pieces and move it so that the two layers meet. Of course, if your image is on a straight line, you don’t have to worry about this.
Now select the upside down layer in your layer window and click on ‘add layer mask’ ![]() .
.
Then simply select ‘gradient tool’ ![]() from the tools panel and select the ‘foreground to background’ gradient pattern which looks like this
from the tools panel and select the ‘foreground to background’ gradient pattern which looks like this ![]() .
.
Then draw a straight vertical line on the upside down image by holding the left mouse button down while dragging.
Now your upside down image should have a fade effect to it.
To complete the reflection effect, you’ll want to select the upside down image and lower the opacity of the layer via the layer window. In the video, I set the opacity to 50% but this can be lower or higher if you’d like. The opacity bar looks like this ![]() .
.
At this point, your image should have a reflection effect added to it.
