Attributes can be used in many different ways in WooCommerce… For example, you can use them to create variable products, list item specifications on product view pages and/or use them as filters on category pages.
When creating a variable product, you can use them to sell physical products, virtual products as well as downloadable products.
In the video below, I show you how I created size and color attributes — and later used those attributes to create a tee shirt listing which gave customers the option of choosing a size and color.
Can’t view the video? Watch it on YouTube
Create your attributes
To start, simply go to your WordPress admin panel and in the left column, hover over “products” and left click on “attributes”.
On the attributes page, simply enter the name of your attribute in the “name” field (In the video, I entered “shirt size”).
In the “slug” field, you can enter your own or leave it blank if you’d rather have the value automatically generated.
For “type” choose between select or text using the drop-down menu. If you choose select, you will be able to select the attributes using a drop-down menu when listing your item. If you choose text, you will need to enter the values separated by bar (|).
Using the “default sort order” drop-down menu, select between:
- Custom ordering
- Name
- Term ID
I chose custom ordering since it lets me rearrange the position of the attributes by dragging them.
Click the “add attribute” button to save.
You can repeat the above step to add as many attributes as you’d like. In the video, I also had an attribute for “color”.
After creating your attribute, you can add values to it by clicking the attribute name in the top right menu.
Adding values is very similar… Simply enter a name — and if you’d like, enter a slug, description and choose a parent.
Click the add button.
List your variable product
After creating your attributes, simply list a product by going to “products > add product” in the left column of your admin panel.
Then select “variable product” for “product data”.
Fill all the fields as you normally would for any other product type (more information is available here), but note that it’s not necessary to enter “inventory” and “shipping” information because this information can be added in the “variations” section.
When finished populating the data, click the “attributes” tab.
In the attributes tab, simply choose the attribute(s) that you’d like to add using the “custom product attribute” drop-down menu and click the “add” button.
Then if you chose “select” for type when you created your attribute, select the “value(s)” with the drop-down menu. If you chose “text”, enter the values separated by bar (|).
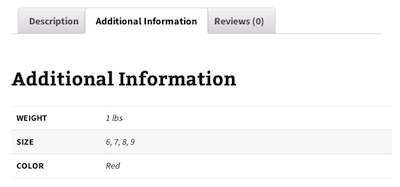
Then check off “visible on the product page” if you want the attribute displayed in “additional information” section. This section looks like this:

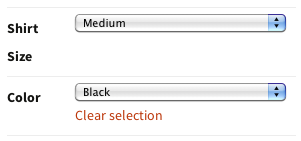
Check off “used for variations” if you’d like to create a drop-down menu for customers. These menus look like this:

When finished, click the “save attributes” button.
Then click the “variations” tab.
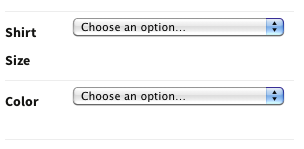
Using the drop-down menu, you can choose defaults for your menus. The values that you choose will be preselected in the drop-down as was “shirt size” and “color” in the image above. If you don’t select a value, the menu will look like this:

Then click the “link all variations” or “add variation” button.
When adding variations, be sure to add one for each combination that you would like to show up.
For example if you have black tees in small, medium and large, you will need to add a variation for:
- Small black
- Medium black
- Large black
For the white tees, you would have to do the same:
- Small white
- Medium white
- Large white
Then in each variation box, enter the details for: SKU, stock, regular price, sale price etc.
Be sure to select an image if you’d like the image to change when your customers select an option using the drop-down menu. Also remember to add a product image in the “product image” box which is located in the right column because if you don’t add one, your item will show up without a thumbnail on the category page.
Note that you can also populate the variation fields in bulk with the “choose a field to bulk edit” — simply make a selection and click the “go” button. Then enter the value in the alert box.
When finished populating all the fields, “publish” your item as you normally would.
Add a filter widget for the attribute
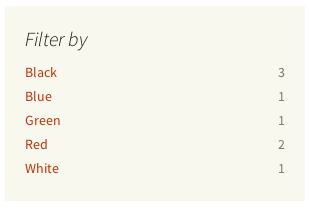
You can add a filter widget such as the one in the image below:

By going to “appearance > customize” in the left column of your admin panel.
Then select your left column or right column, and click the “add a widget” button and choose “WooCommerce Layered Nav”.
Change or keep the “title” as is.
Use the drop-down menu to choose the attribute that you would like to be used in the widget.
Choose a “display type” and “query type”.
When finished, click the “save & publish” button.
