As with everything else Magento related, the category creation page offers plenty of options and is pretty advanced when compared to other shopping carts. For example, Magento gives you plenty of control over design, SEO, category structure and more.
In the video below I provide a detailed tutorial on categories, subcategories, META tags, store views etc.
Can’t view the video? Watch it on YouTube
To start, simply go “Catalog > Manage Categories”.
Once on the manage categories page, you will notice 2 buttons which read ‘add root category’ and ‘add subcategory’. Note that a root category serves more as a placeholder for subcategories. In other words, you enter any categories that you want seen in your store as a subcategory within a root category.
If you have multiple store views, you can enter a root category and subcategory for each store view separately by selecting the store view as shown in the picture below:
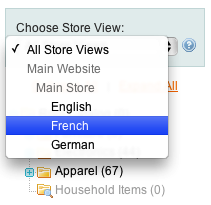
Or you can enter a root category and subcategories for ‘all store views’. If you select ‘all store views’, the same category structure will be used for all store views.
If you do not have store views setup, you do not need to worry about this menu and can just focus on the category structure that you have. By default, Magento has a ‘default category’ setup already. This default category is a root category.
So to show a category in your store, you would add the category as a subcategory by clicking on a root category and then clicking the ‘add subcategory button’.
On the next page, you will need to enter a name for your subcategory which can be anything that you’d like. In the video, I created a category called ‘Shoes’.
For ‘is active’, you’d want to select “Yes” if you want the category to show in your store.
For ‘url key’, you’d enter the URL path of your category. In the video I entered shoes. Personally, I use the same value that I enter for the name. I recommend keeping this value lowercase with only letters, numbers, underscores (_) and dashes (-). Also avoid entering a url key that you have already used.
If you’d like, you can upload a category image via the ‘thumbnail image’ field.
Enter a description if you’d like in the ‘description field’. Note that you can also use the WYSIWYG editor to give your text some style.
As for ‘page title’, this is the page title that is seen in web browsers. Note that most search engines also use this value for search engine results listings.
For ‘meta keywords’, enter keywords that describe your category and separate them by a comma (,).
For ‘meta description’, enter a brief description of the category. Remember to leave out HTML tags.
Note that for more information on META tags, you may want to read my article on: how to know if your shopping cart is search engine friendly.
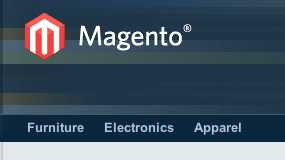
As for ‘include in navigation menu’, if you select “Yes”, your category will show up in the navigation menu. See the image below for an example:
Once you have finished entering your information, move onto the ‘display settings’ tab.
In the display mode, you have the option of choosing ‘products only’, ‘static block only’ and ‘static block and products’. Here is an explanation of each:
Products only is a list of products on the category page which looks similar to this:
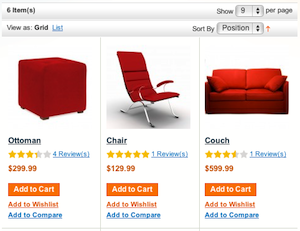
As for ‘static block only’, these are created in your admin panel by going to “CMS > Static Blocks”. These static blocks contain HTML code so if you are looking to turn your page into a custom designed page, you can with this option.
Static blocks and products are a combination of both.
If you decide to use a static block, you’ll want to select it via the ‘CMS block’ dropdown menu.
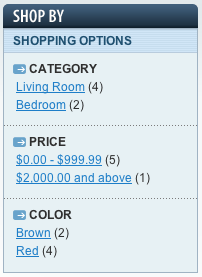
As for ‘is anchor’, if you select “Yes”, a layered navigation menu will appear on category pages. This menu looks like this:
In the ‘available product listing sort by’ menu, you can select the sort options that you’d like to appear in store menus on category pages. The sort menu looks similar to this:
![]()
As for ‘default product listing sort by’, here you’d select the default sort for the menu above.
As for ‘layered navigation price step’, this is the price option in the layered navigation menu which looks like the one in the image below:

Note that for ‘use config settings’ you would set these defaults in “System > Configuration > Catalog > Catalog > Frontend” and “System > Configuration > Catalog > Catalog > Layered Navigation”.
If you’d like to use a design other than default for the category, you can set your design by clicking the ‘design’ tab.
To add products to your category, go to the ‘category products’ tab and select your product(s).
When finished, click the ‘save category’ button in the top right.
If you’d like to add subcategories to the category you just created, simply click on the category in the left menu and then click the ‘add subcategory’ button and repeat the above steps. Subcategories that you add will show up like in the image below in the nav menu:
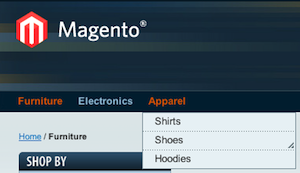
Just keep in mind that your theme may display the subcategories in a different way.
To add an independent category as shown in the image above, e.g., ‘furniture’, ‘electronics’, ‘apparel’, you would click on your root category and then click the ‘add subcategory’ button and repeat the same steps explained above — you do this for each category.
