If you are looking to sell build your own items, items with warranties or items that offer optional add-ons, creating a bundle item is the way to go about selling them in a Magento powered store.
When I first came across this product type I was both impressed and confused. I was impressed that such a feature existed, but was confused about how to create one. The dynamic/fixed fields are what confused me at first, but after a couple of minutes I got the point.
If you are listing a product for the very first time in Magento, I recommend learning how to list a simple product or virtual product prior to proceeding with this tutorial since they are used to create bundle products. If you’re planning on using attributes or attribute sets, this tutorial is also recommended.
In the video below I show you how to list bundle products:
To start, simply go to ‘catalog > manage products’ and click ‘add product’.
Can’t view the video? Watch it on YouTube
Next choose an attribute set and select “bundle product” for product type.
In the general section, enter your information into the fields as you would on a simple product or virtual product. For SKU, enter your SKU and choose either dynamic or fixed. If you choose dynamic, the SKU will be modified using the SKUs of the associated simple or virtual products. If you choose fixed, the SKU that is entered into the field will be used on order detail pages.
For weight, you can enter a fixed value or leave it as dynamic. If you leave it as dynamic, the system will automatically calculate the weight based on the products that are selected.
In the prices section, you can choose dynamic or fixed for ‘price’. If you choose ‘dynamic’, you can leave this field blank and the price will be calculated based on the options that are selected — the prices you entered for the simple or virtual product(s) will be used to calculate the price. If you choose ‘fixed’ and enter a price, the price that you enter will be charged regardless of which items are selected from the list of options.
For ‘special price’, if you’d like to offer the item at a discount, you must enter a %. Note that if you are looking to offer the item at a 10% discount, you must enter 90. For a 20% discount, you would enter 80. Of course if you don’t want to offer the item at a discounted price, you just leave this field empty.
For ‘price view’, you can choose either ‘price range’ or ‘as low as’. If you choose price range, the price would be shown as:

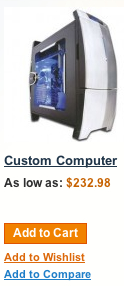
If you choose as low as it would show up as:
In the ‘inventory’ section, you’ll want to choose ‘in stock’ if you want the item to go live after submitting the listing.
Once you have completed all the field, go to the ‘bundle items’ section.
In this section choose whether the items ship together or separately using the dropdown menu.
To add an option, click the ‘add new option’ button.
In the ‘default title’ field, enter a name for the option. For example, if you are offering a warranty, you would enter ‘Warranty’ in this field.
Then choose an ‘input type’. This input type can be a:
- Drop-down
- Radio button
- Checkbox
- Multi select
Note that if you’d like to limit your customers to just one option, you should choose ‘drop-down’ or ‘radio button’.
To make a selection mandatory, be sure to select “Yes” for ‘is required’.
Then simply click the ‘add selection’ button to associate products with the option.
Tick off the items that you’d like to add as an option and then click the ‘add selected product(s) to option’.
Note that you can enter a default quantity for each product in the ‘default qty’ field. You can allow your customers to change this quantity by selecting “Yes” for ‘user defined qty’. If you select “No”, the default qty cannot be changed.
To add more options, simply click the ‘add new option’ button and repeat the steps above.
Note that you can change the position of each option by entering a number into the position field which is located next to the ‘add selection’ button.
Note that you can prevent the items which have been added as options from showing up in your store on their own by setting their ‘visibility’ to ‘not visible individually’.
Once a bundle product has been created, the options will look similar to this:
