If you are looking to sell music, movies, games, programs, plugins, themes or anything else that is downloadable, the Magento downloadable product type is a great way to go about doing it because it’s very flexible.
For example, you can offer samples, limit the number of times that your customer can download the product, whether they need to register an account prior to downloading, whether the download is shareable and more.
In the video below I show you how I listed a downloadable product and also how I fixed some errors that I came across while creating the listing.
Can’t view the video? Watch it on YouTube
If this is your first time listing a product in Magento, I recommend this tutorial on how to list a virtual product since the process is similar and it goes over the basic fields in detail. Of course, you may also be interested in reading how to create categories, setup tax rates and cross promote products.
To configure your store for downloadable goods, simply go to “system > configuration” and then click “catalog” which is located in the left column in the “catalog” box and expand the menu “downloadable product options”. To save your configuration, simply click the “save config” button.
To list your product, go to “catalog > manage products” and click the “add product” button in the top right.
Then select an ‘attribute set’ (more details on attributes can be found here) and select ‘downloadable product’ as the ‘product type’ and click the ‘continue’ button.
After you’ve entered in basic information for your listing, go to the ‘downloadable information’ section.
Prior to uploading any files, you show ensure that your downloadable directory is writeable and readable. This directory is located in the ‘media’ directory. I basically set 777 permissions for that directory but 755 permission may also work. To ensure that things are working properly, I recommend uploading your file and then placing a test order to see if everything is working as expected.
In the video, I actually came across a little error… I tried uploading a file that was larger than 2MB and received the error “Maximum allowed file size for upload is 2M. Please check your PHP settings.”.
I fixed the above error by editing my php.ini file. I basically added the following lines to the bottom of the page:
upload_max_filesize = 8M
post_max_size = 8M
Note that you should change the 8M to a size that accommodates the size of your files.
If you currently have a listing that is in the process of being created, note that Magento won’t detect your new PHP settings until you list another item. To avoid losing information that you’ve already entered, simply save your listing and then edit the listing.
In the downloadable information section, you will see a box for ‘samples’ as well as a box for ‘links’.
In the samples box you can upload a file or enter the link of a sample. These aren’t necessary but are a good way to let your visitors preview downloads prior to purchasing.
To add a sample, simply click the ‘add new row’ button and then enter a title in the ‘title’ field. You can enter anything you want in this field. In the video I entered ‘sample track’.
To add files that you want to sell, go to the ‘links’ box. In this box you can enter a custom heading in the ‘title’ field. You can also choose whether ‘links can be purchased seperately’ by selecting ‘Yes’ or ‘No’.
To add your files, simply click the ‘add new row’ button.
Then simply enter in the following details for each row:
- Title (the name of your download. If you are selling music, this could be the name of the track.)
- Price (this is optional. If you enter an amount here, it will be added to the price that you entered in the ‘prices’ section.)
- Max. Downloads (if you enter a number in this field, your customers will only be able to download the file an x amount of times. If you tick off ‘unlimited’, they will be able to download the file an unlimited amount of times.)
- Shareable (whether they can share the file.)
- Sample (here you can upload or provide the link of a sample file.)
- File (this is where you upload or provide the link of the file that you are selling.)
When finished entering in the above details, simply click the ‘upload files’ button.
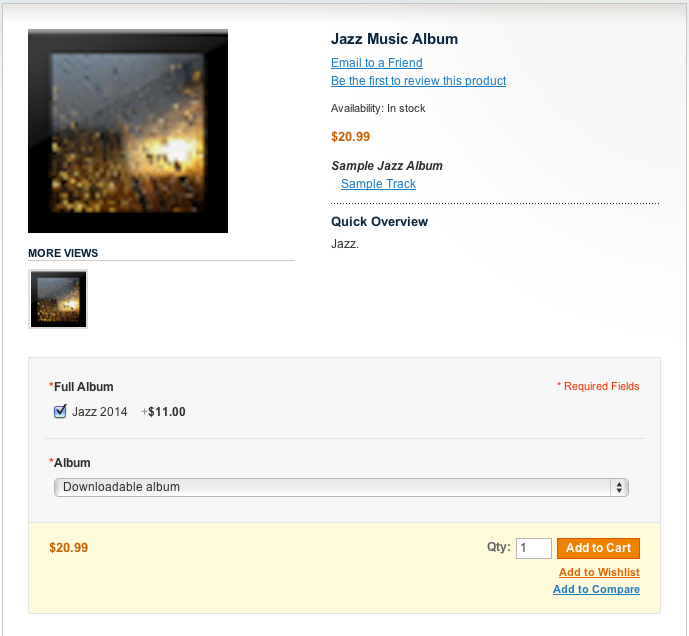
To list your product, click the ‘save’ button. When I finished creating my product, it looked like this:

