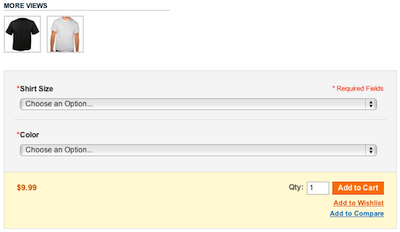
When I first hear about configurable products, I kind of had the wrong impression… I actually thought they were like custom options in simple products, but later learned that a configurable product is actually more of a listing that is made up of numerous simple products.
Why do when need this? Allow me to explain… When you add custom options to a simple product, say for example sizes for tee shirts, the stock of those tee shirt sizes aren’t managed individually.
On a configurable product on the other hand, the stock is managed for each size. This is great if you have limited stock of each size. If not, a simple product with custom options will do the job just fine and will actually take less time.
Of course for those of you that need to manage stock individually, simply watch the video below or read the written tutorial beneath the video to learn how to create a configurable product.
Note that you should look at the following tutorials prior to listing a configurable product if you are new to Magento:
Create your attributes and attribute sets
Can’t view the video? Watch it on YouTube
To create a configurable product, simply create attributes and an attribute set for the type of products that you are looking to list. In the video I had 2 attributes; one was for color and the other was for size. I then added these attributes to an attribute set named ‘shirts t’.
Note that attributes for configurable products must:
- Have ‘scope’ as ‘global’.
- Have ‘catalog input type for store owner’ as a dropdown menu.
- Have “Yes” selected for ‘use to create configurable product’.
Create your simple products
After you’ve created your attributes, you will want to create a simple product for each variation. In the video, I created 4 simple products because I had 4 kinds of tee shirts to sell. I had black tee shirts in medium and large and white tee shirts in medium and large.
When I listed these tee shirts I set the ‘status’ to ‘enabled’ and the ‘visibility’ for each listing as ‘not visible individually’ because I didn’t want these listings to show up on category pages or in search. Instead, I only wanted these sizes and colors to show up on 1 listing which was the configurable product listing.
I then made sure to select the right attributes for each listing; on the 4 listings I selected the attributes as so:
- Color: Black, Size: Medium
- Color: Black, Size: Large
- Color: White, Size: Medium
- Color: White, Size: Large
For each of those listings, I entered the quantity and made sure that ‘stock availability’ was set as ‘in stock’ in the ‘inventory’ section.
Create your configurable product
Other than having to associate products, a configurable product is no different from a simple product.
So simply list your configurable product as you would a simple product and go to the associated products section and tick off the checkboxes next to the corresponding products.
Note that a ‘super product attributes configuration’ box will appear after you’ve selected your products. In this box you will notice that your attributes have been grouped. You can actually move these groups up or down. The position of these attributes will actually be the same as in the front end.
For example I had the color attribute above the size attribute and both were a requirement. So when my buyer went to purchase the item, they had to first select a color and then a size. The dropdown menu looked like this:

You can even set a price for each option individually in the ‘super product attributes configuration’ box where you can choose between fixed or percentage.
If you set a price there, the customer will pay a different price for the selected option than what is specified in the ‘prices’ section. If you leave the price on an option empty, the buyer will pay the price that you’ve specified in the ‘prices’ section.
